
PREPRESS OPERATIONS
I worked as an operator in the Prepress Department where I experienced just how critical my design work was to the overall print and manufacturing processes. Providing high quality design with a positive efficiency rate was critical in the art department. Working from a blueprint I designed nameplates and many other labeling solutions for customers in the automotive, aerospace, defense, and industrial OEM sectors.
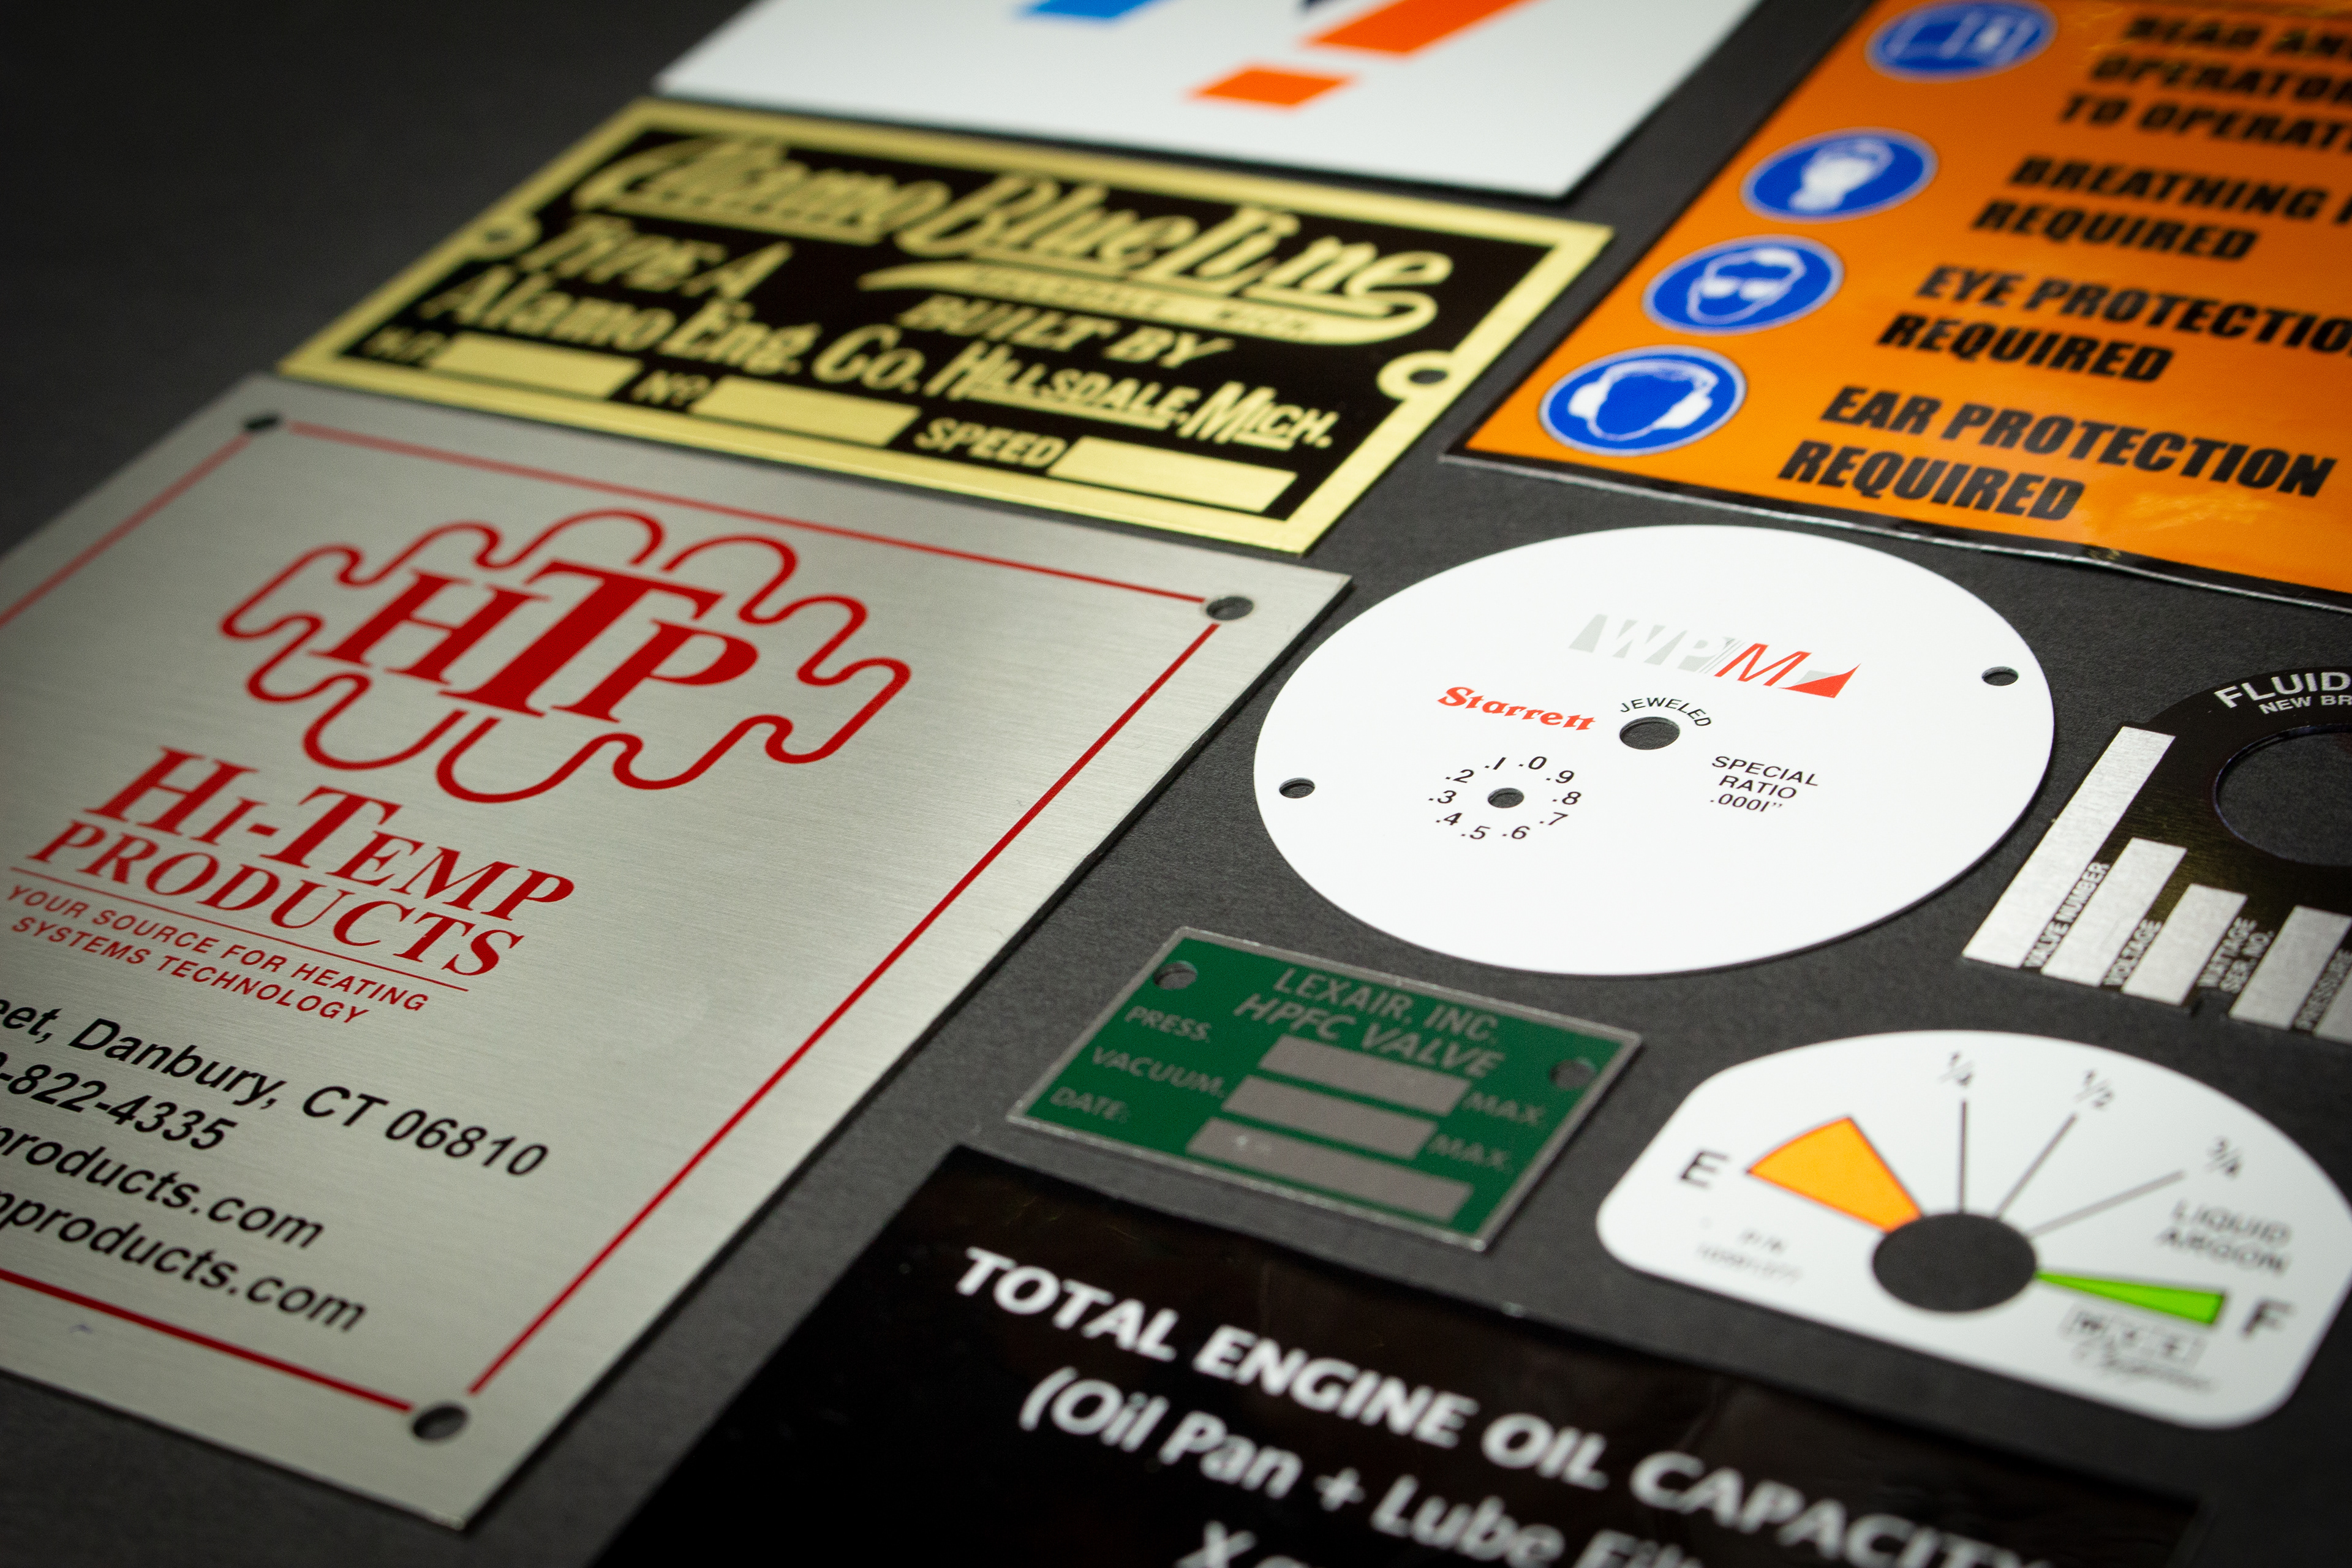
Nameplate & label Examples: Automotive, Aerospace, Defense, and Industrial OEM industries
PROOFS & STEP & REPEAT
Each new design was created as a proof to be sent out to and approved by the customer before production. All proofs required specific information before designing could take place. All the pertinent information off the purchase order would be recorded onto the front of what was called a design traveler. A design traveler was a packet that contained the blueprint, purchase order, and any other important information regarding the design or application of the job that was put together by a customer service representative in the office. I would then record all this information on the bottom of proof sheet. A lot of times when recording this information there would be more digging required into Military-Specification documents which may contain the color, font, dimensions, or material to be used. This was normal for the designer to interpret because a lot of times for aerospace and defense customers, they would only provide limited information to the customer service team to record before the job came to my team and I in Prepress for the design. When this happened I would thoroughly inspect the blueprint provided and do the needed research so that I designed accurately.
After I received feedback or approval, the next steps taken were to correct any edits the customer requested of me to make or to proceed the job into the scheduling department for production. After the job had been scheduled for production, it was now time to create the production file. Production files were called "Step & Repeat," and the setup for one individual job was called a "Step Up." I would create an art board that matched the material size that was to be pulled and printed on by our screen printers or metal photo operators. See my case studies below that cover the operations in setting up a full shear and multi-function step up.
FULL SHEAR

Art Proof

Step Up: Full Shear

Nameplate
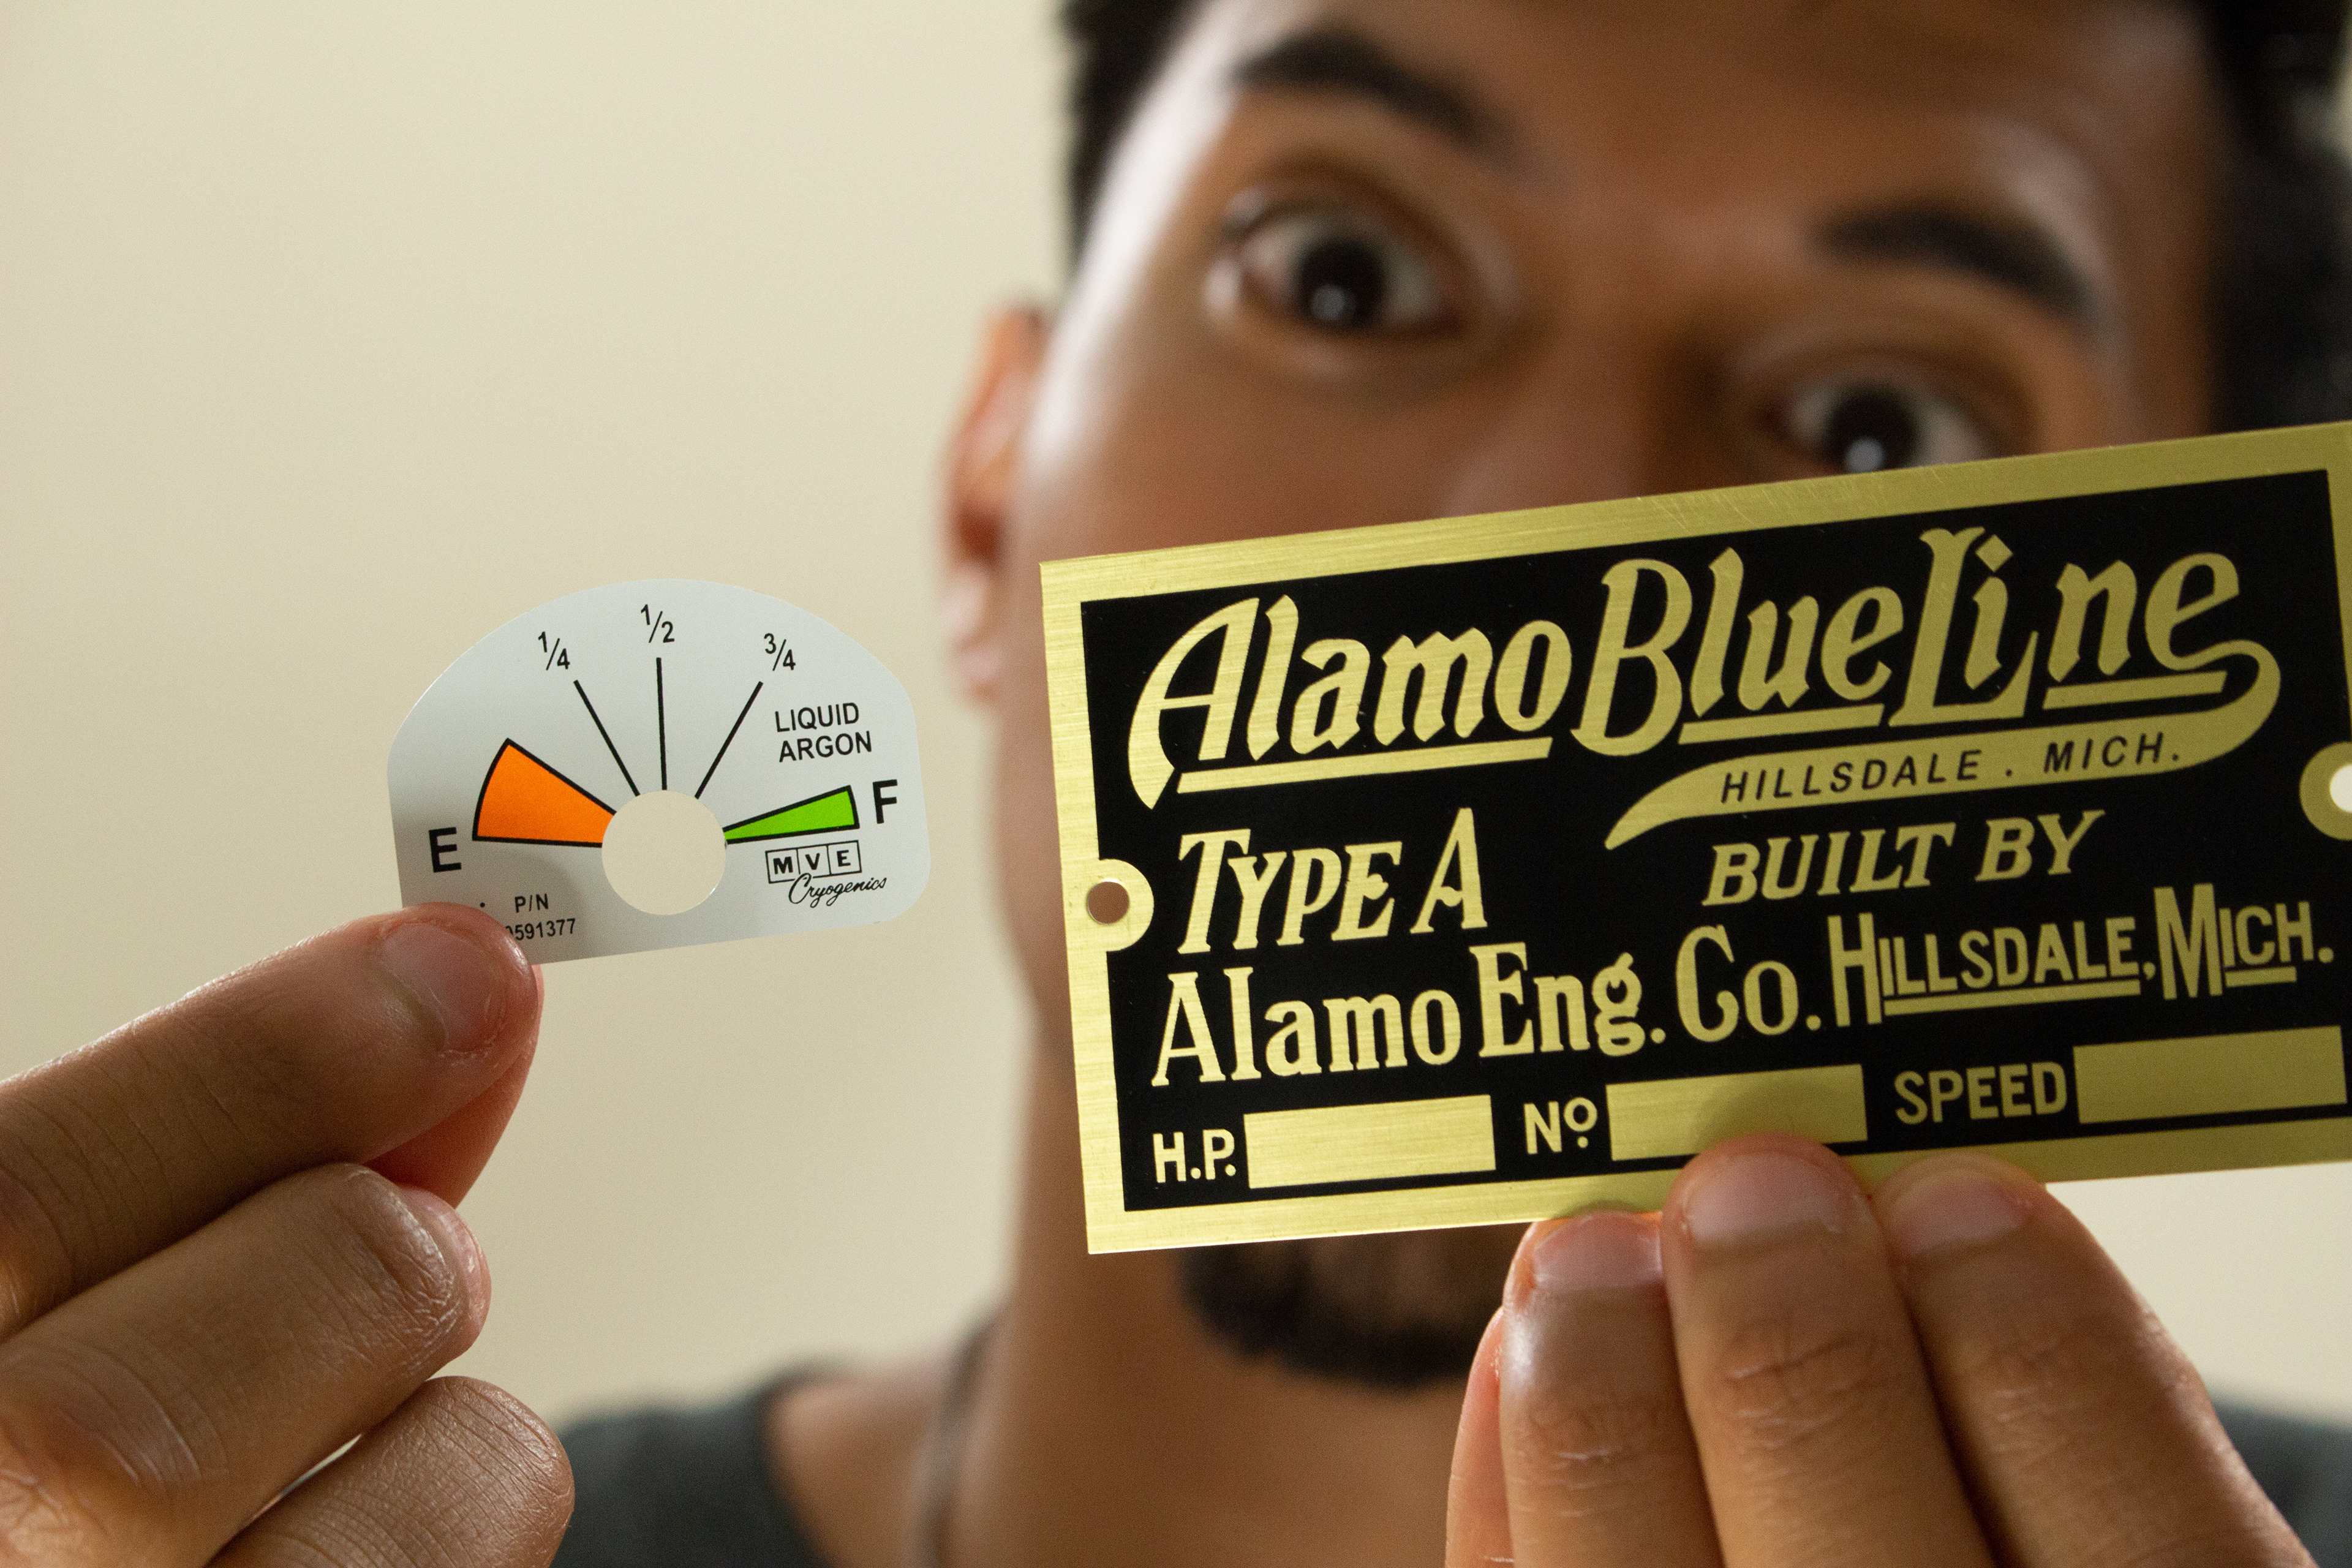
ART PROOF
For this job, it was heavily custom made but it wasn't for anyone in the defense or aerospace industry. The customer took old rusted nameplates he found and would submit purchase orders to have them recreated by us. Every job is unique when designing it, but this one in particular required me to re-design the lettering, and estimate the positioning of the pads and the size of them which weren't called out on the PO or the blueprint.
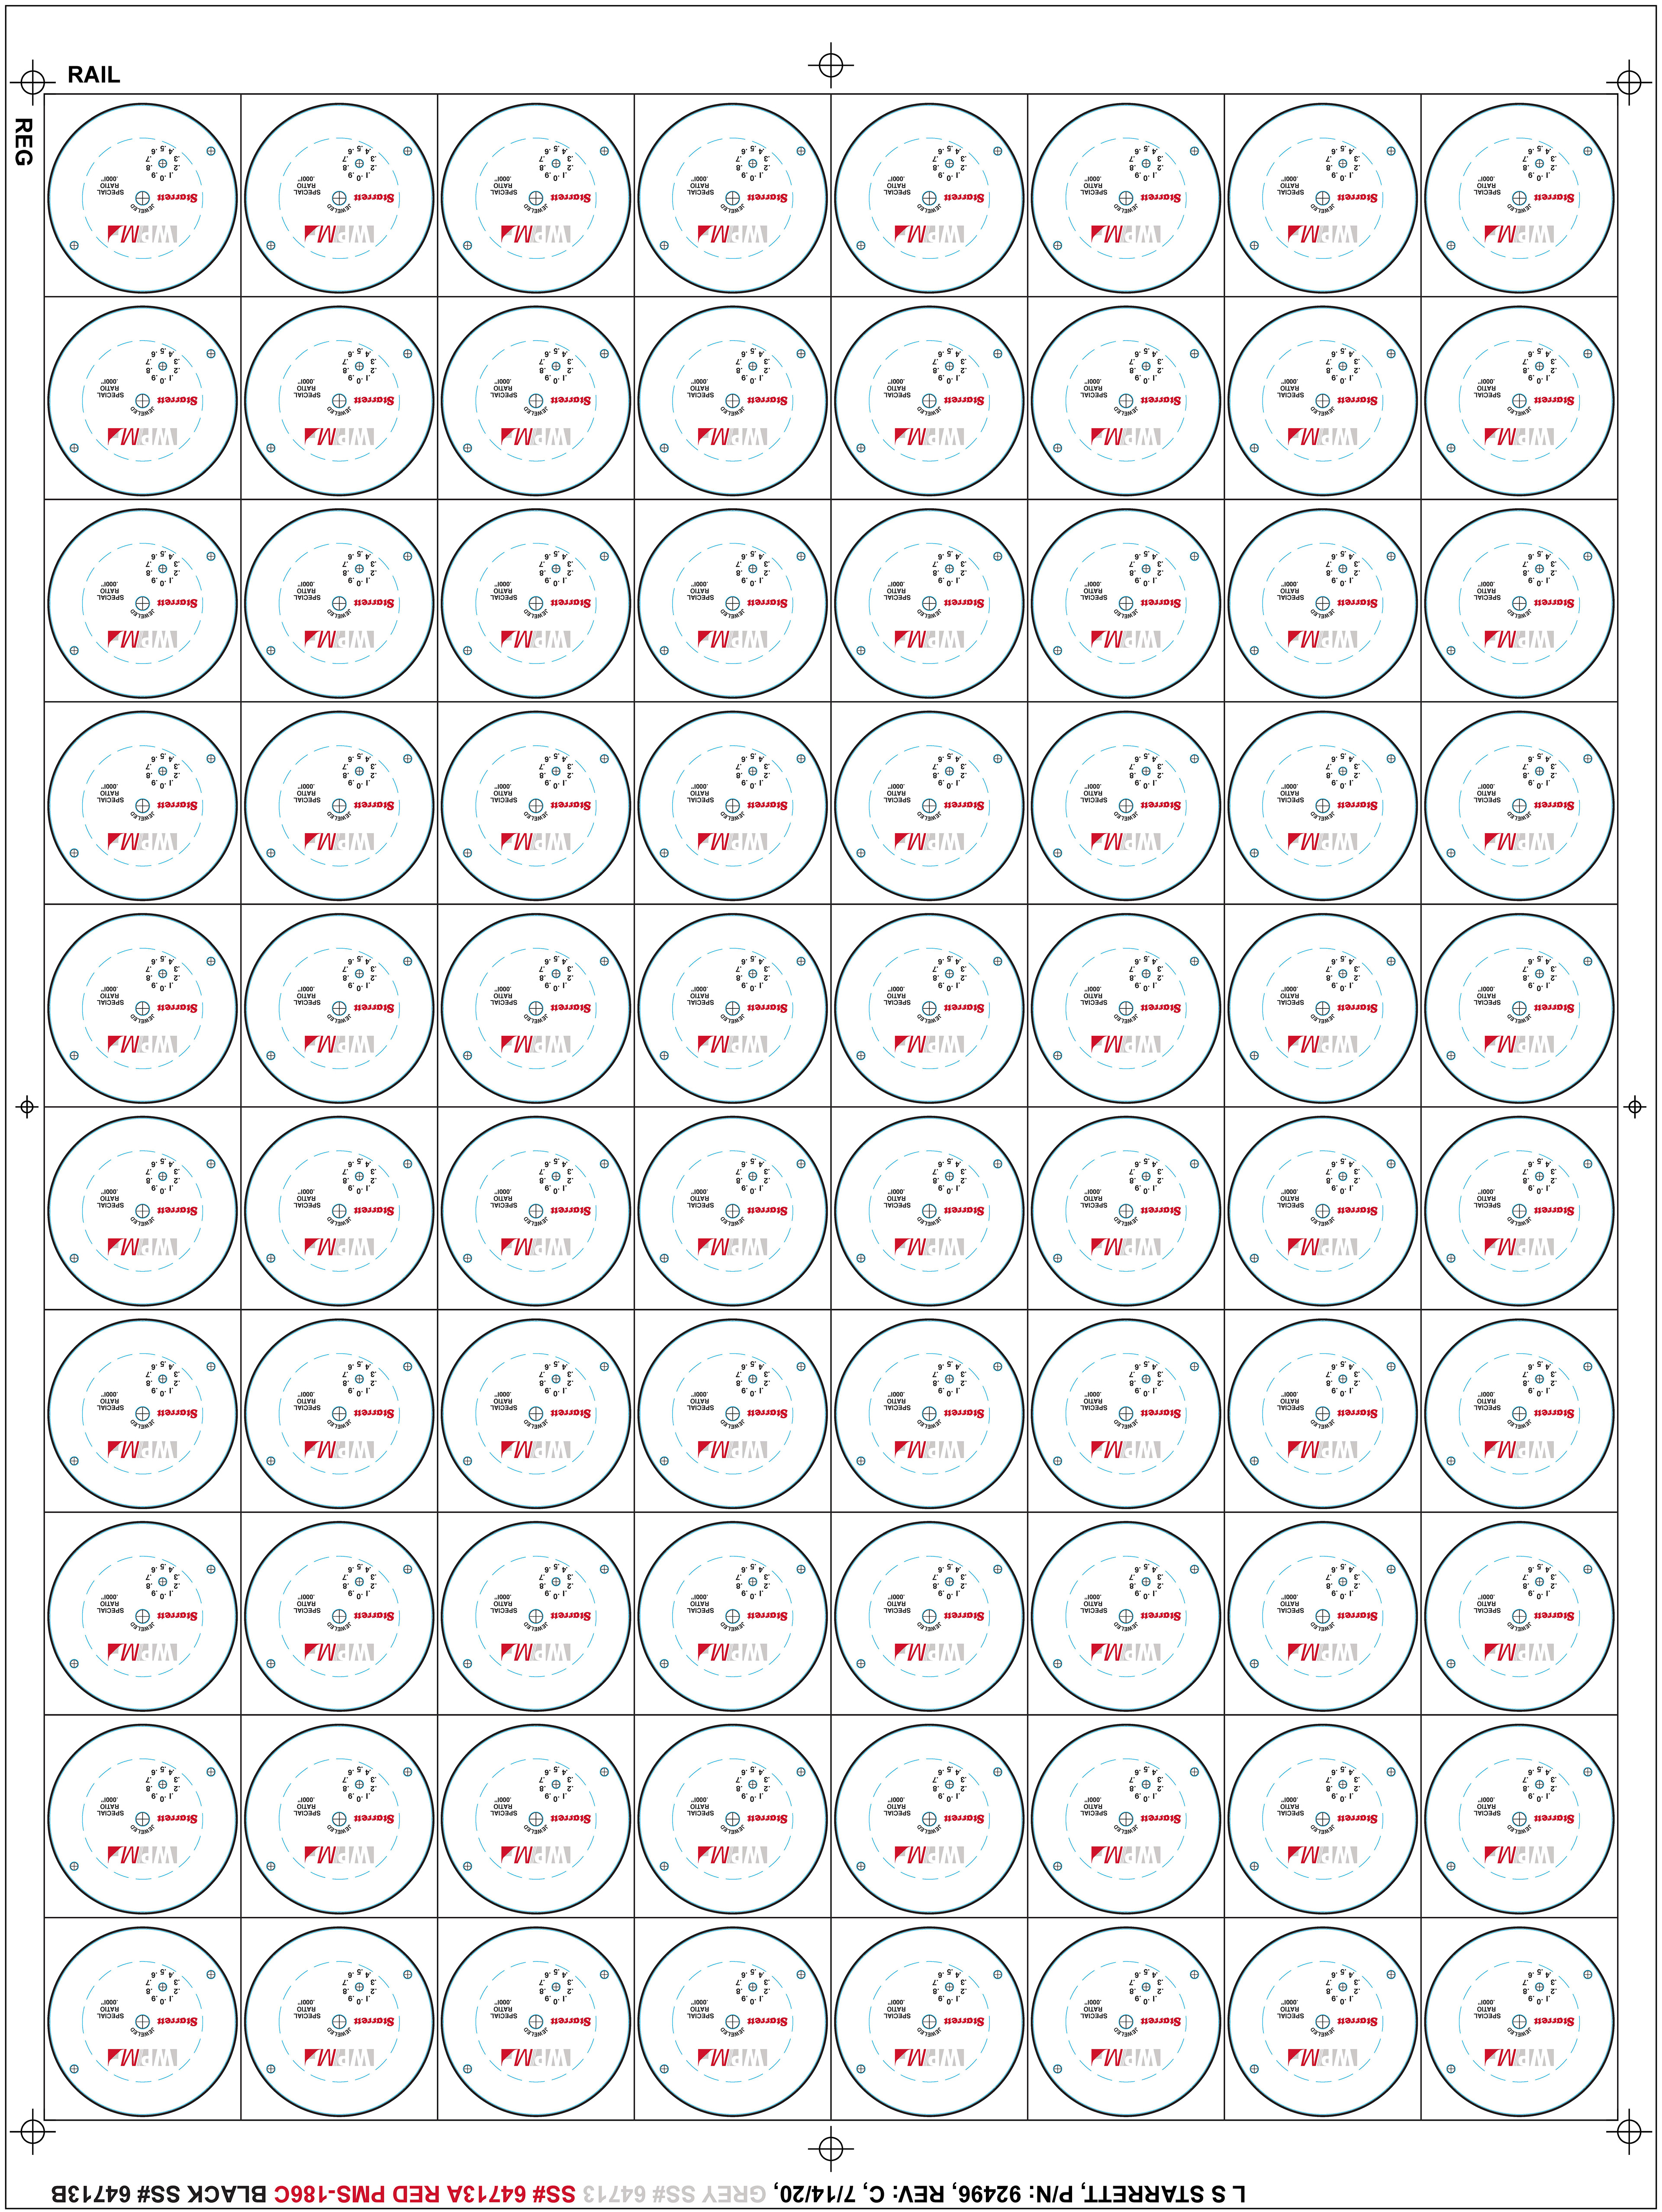
STEP & REPEAT
A full shear set up is the easiest type to complete. This is because the pieces sit flush against each other with basic crop and vision marks along the reg and rail. These markups are all required so that the operators on the shop floor could print and cut accurately. Completing a job like this one takes usually about 3 to 5 mins to setup, but sometimes can take longer depending on if trapping colors is needed. Setting up this job was to be on an 18 inch by 24 inch sheet of brass material.
HOW I CREATED THE STEP UP
1.) I placed a copy of the individual nameplate drawing onto the 18" x 24" art board.
2.) Before stepping up the copied piece, I rotated it vertically.
3.) My zero point was where I positioned the copied piece.
4.) The yield (quantity) on one sheet of material was 48 plates. I stepped up the copied piece 6 times down and 8 times across. Yield was always provided by the office on the step & repeat traveler. This traveler contains the same information as the design traveler except with an activity listing describing how this job will run through each
department on the shop floor.
department on the shop floor.
5.) My vision marks, reg and rail, and job information were added next.
6.) The job was completed and needed to have film outputted emulsion up negative for the etch process. The background was to be recessed with raised natural copy.
MULTI-FUNCTION
Art Proof

Multi-Function Step Up: Front
Multi-Function Step Up: Backside

Gauge
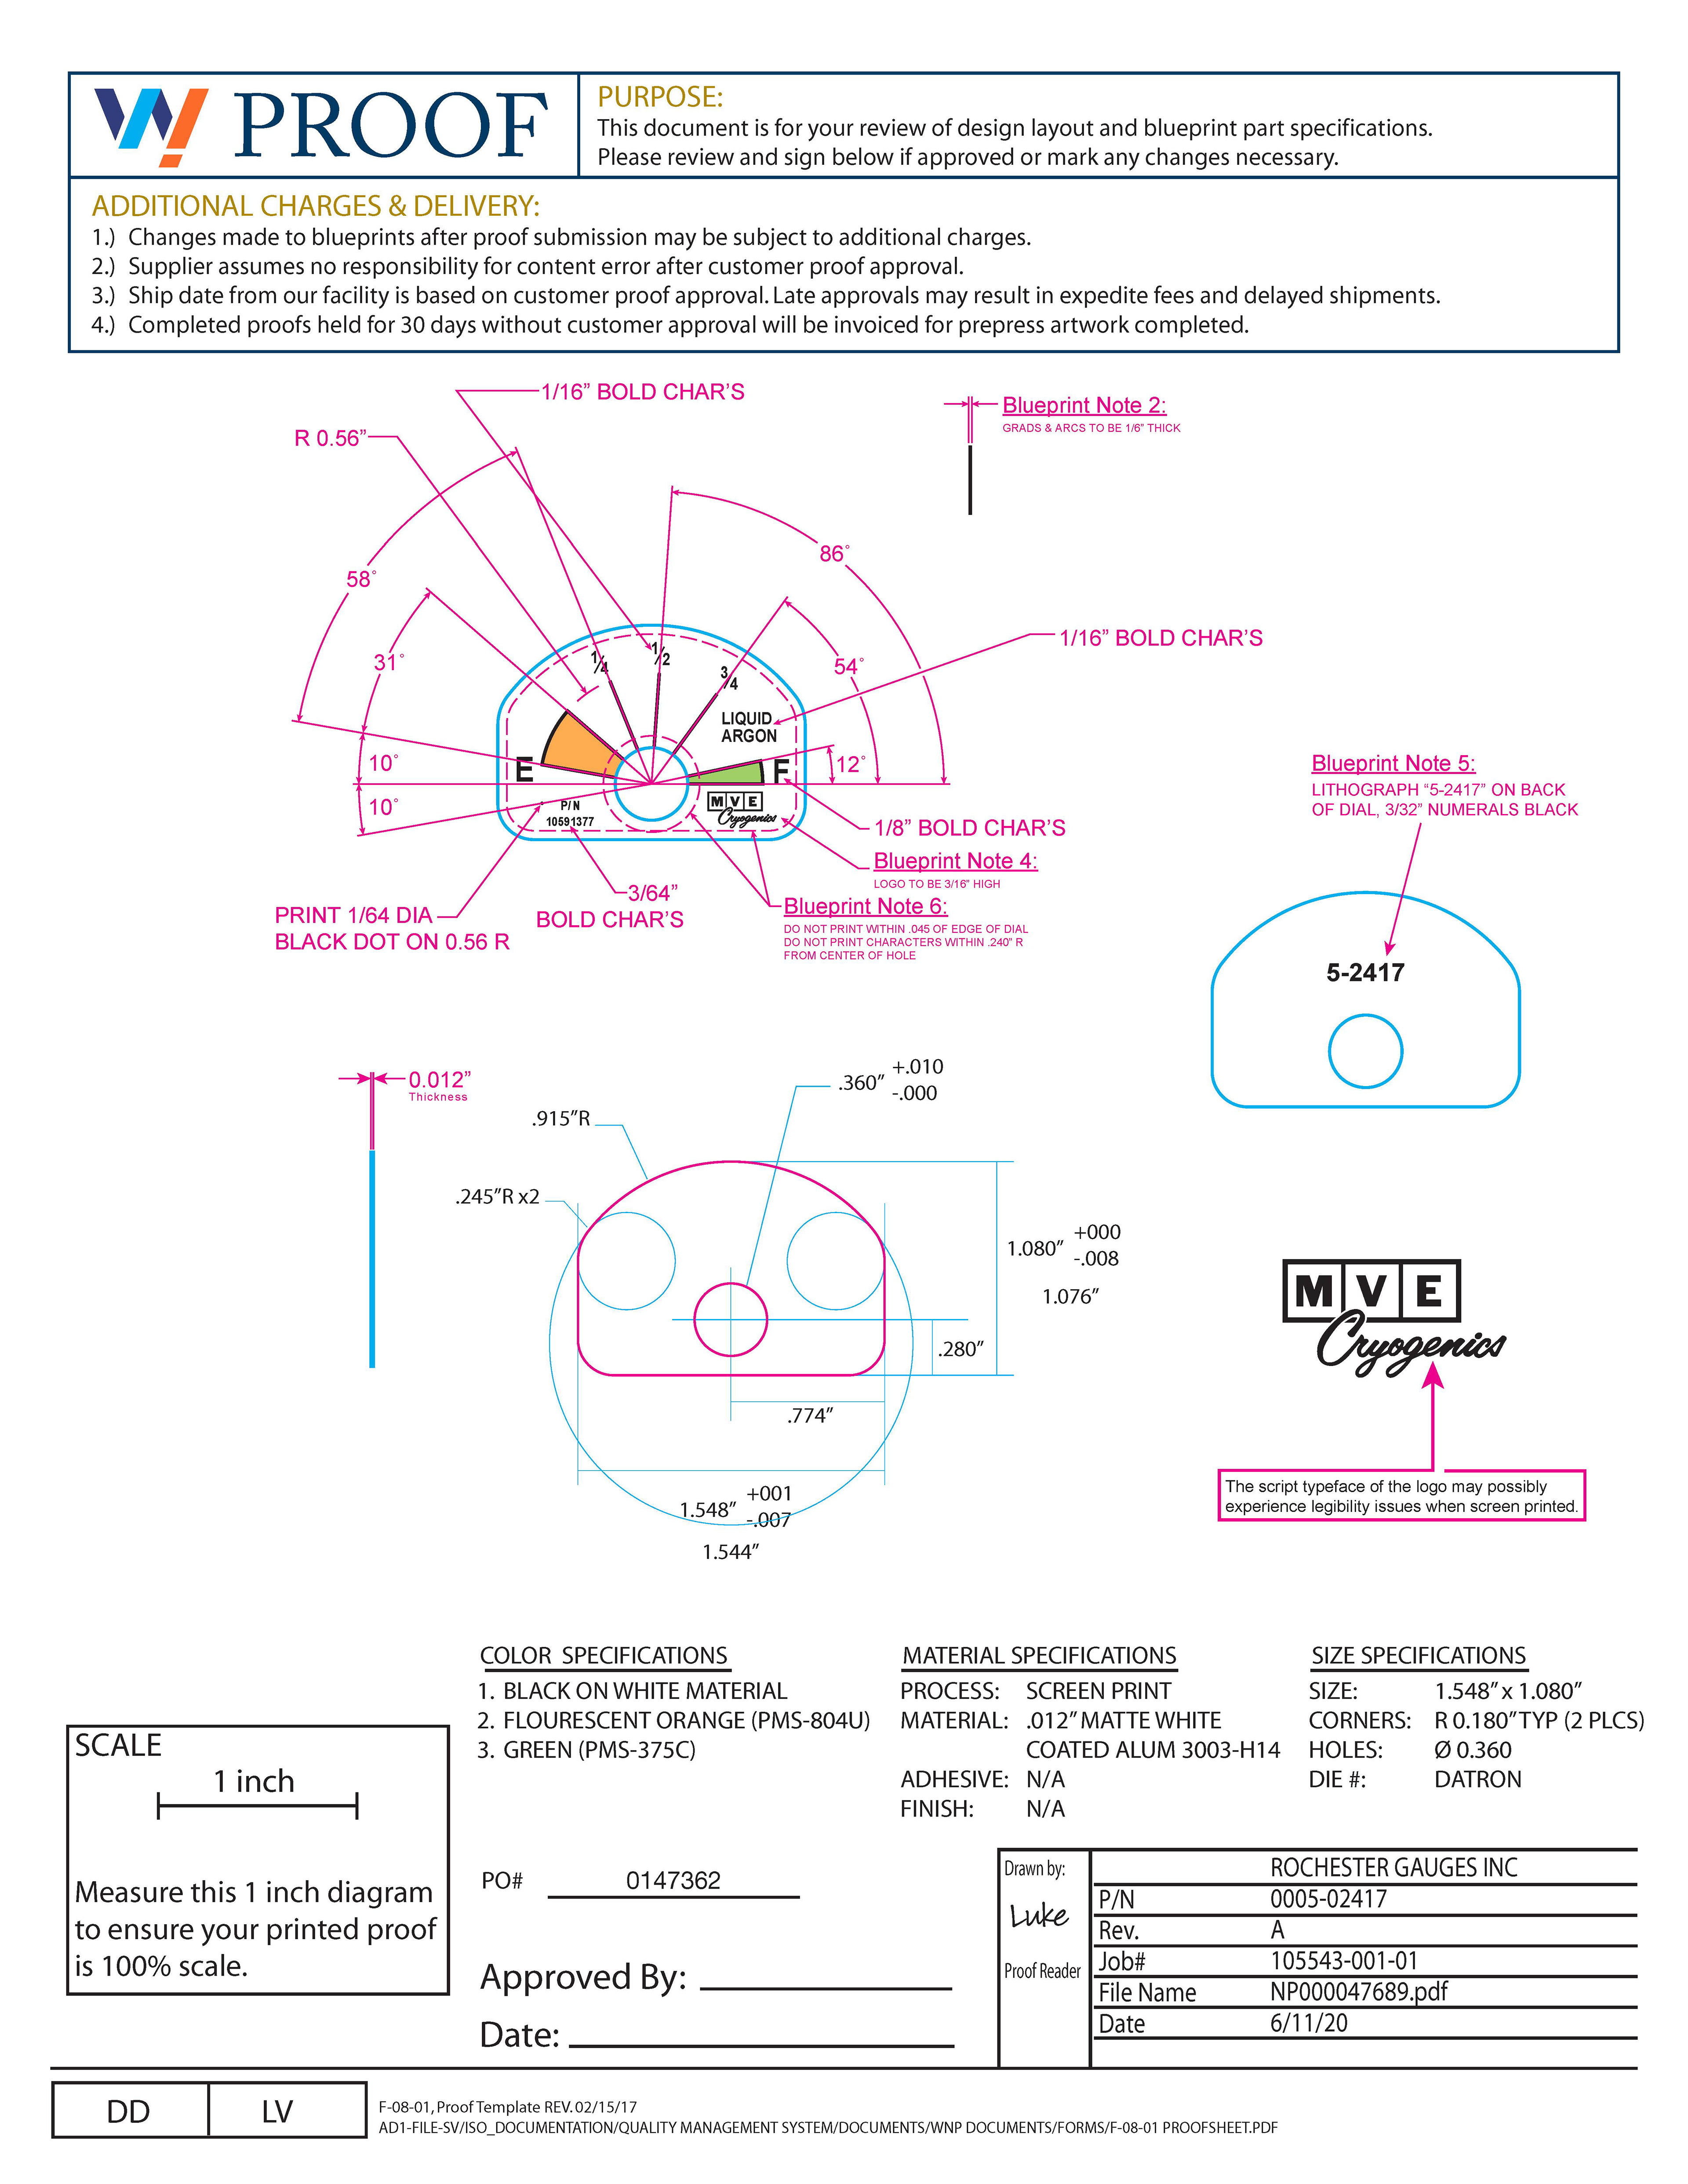
ART PROOF
Rochester Gauges thoroughly analyzed the dimensions of each gauge designed for them. Every blueprint like this one was precise all over with tight tolerances or no tolerances at all. To design this part, it took about 2.5 close to 3 hours. I had to make sure that my part size, corner radius's, hole size, text height, line size, and logo size all were created accurately. There was much more in-depth design work put into completing this job then just those basic examples. I had to also make sure that my kerning was adjusted correctly for each word or fraction, the thickness of the line-work had a specific dimension, each line had to be positioned at certain degree angles, lettering had an approximate distance from the tops of each line, and the logo had to be redesigned from scratch. Even the little dot to the left of the part number had specific size dimensions and positioning called out. This job was challenging, but was rewarded with great customer appreciation and the satisfaction of seeing the finished product come to life after being printed and manufactured.
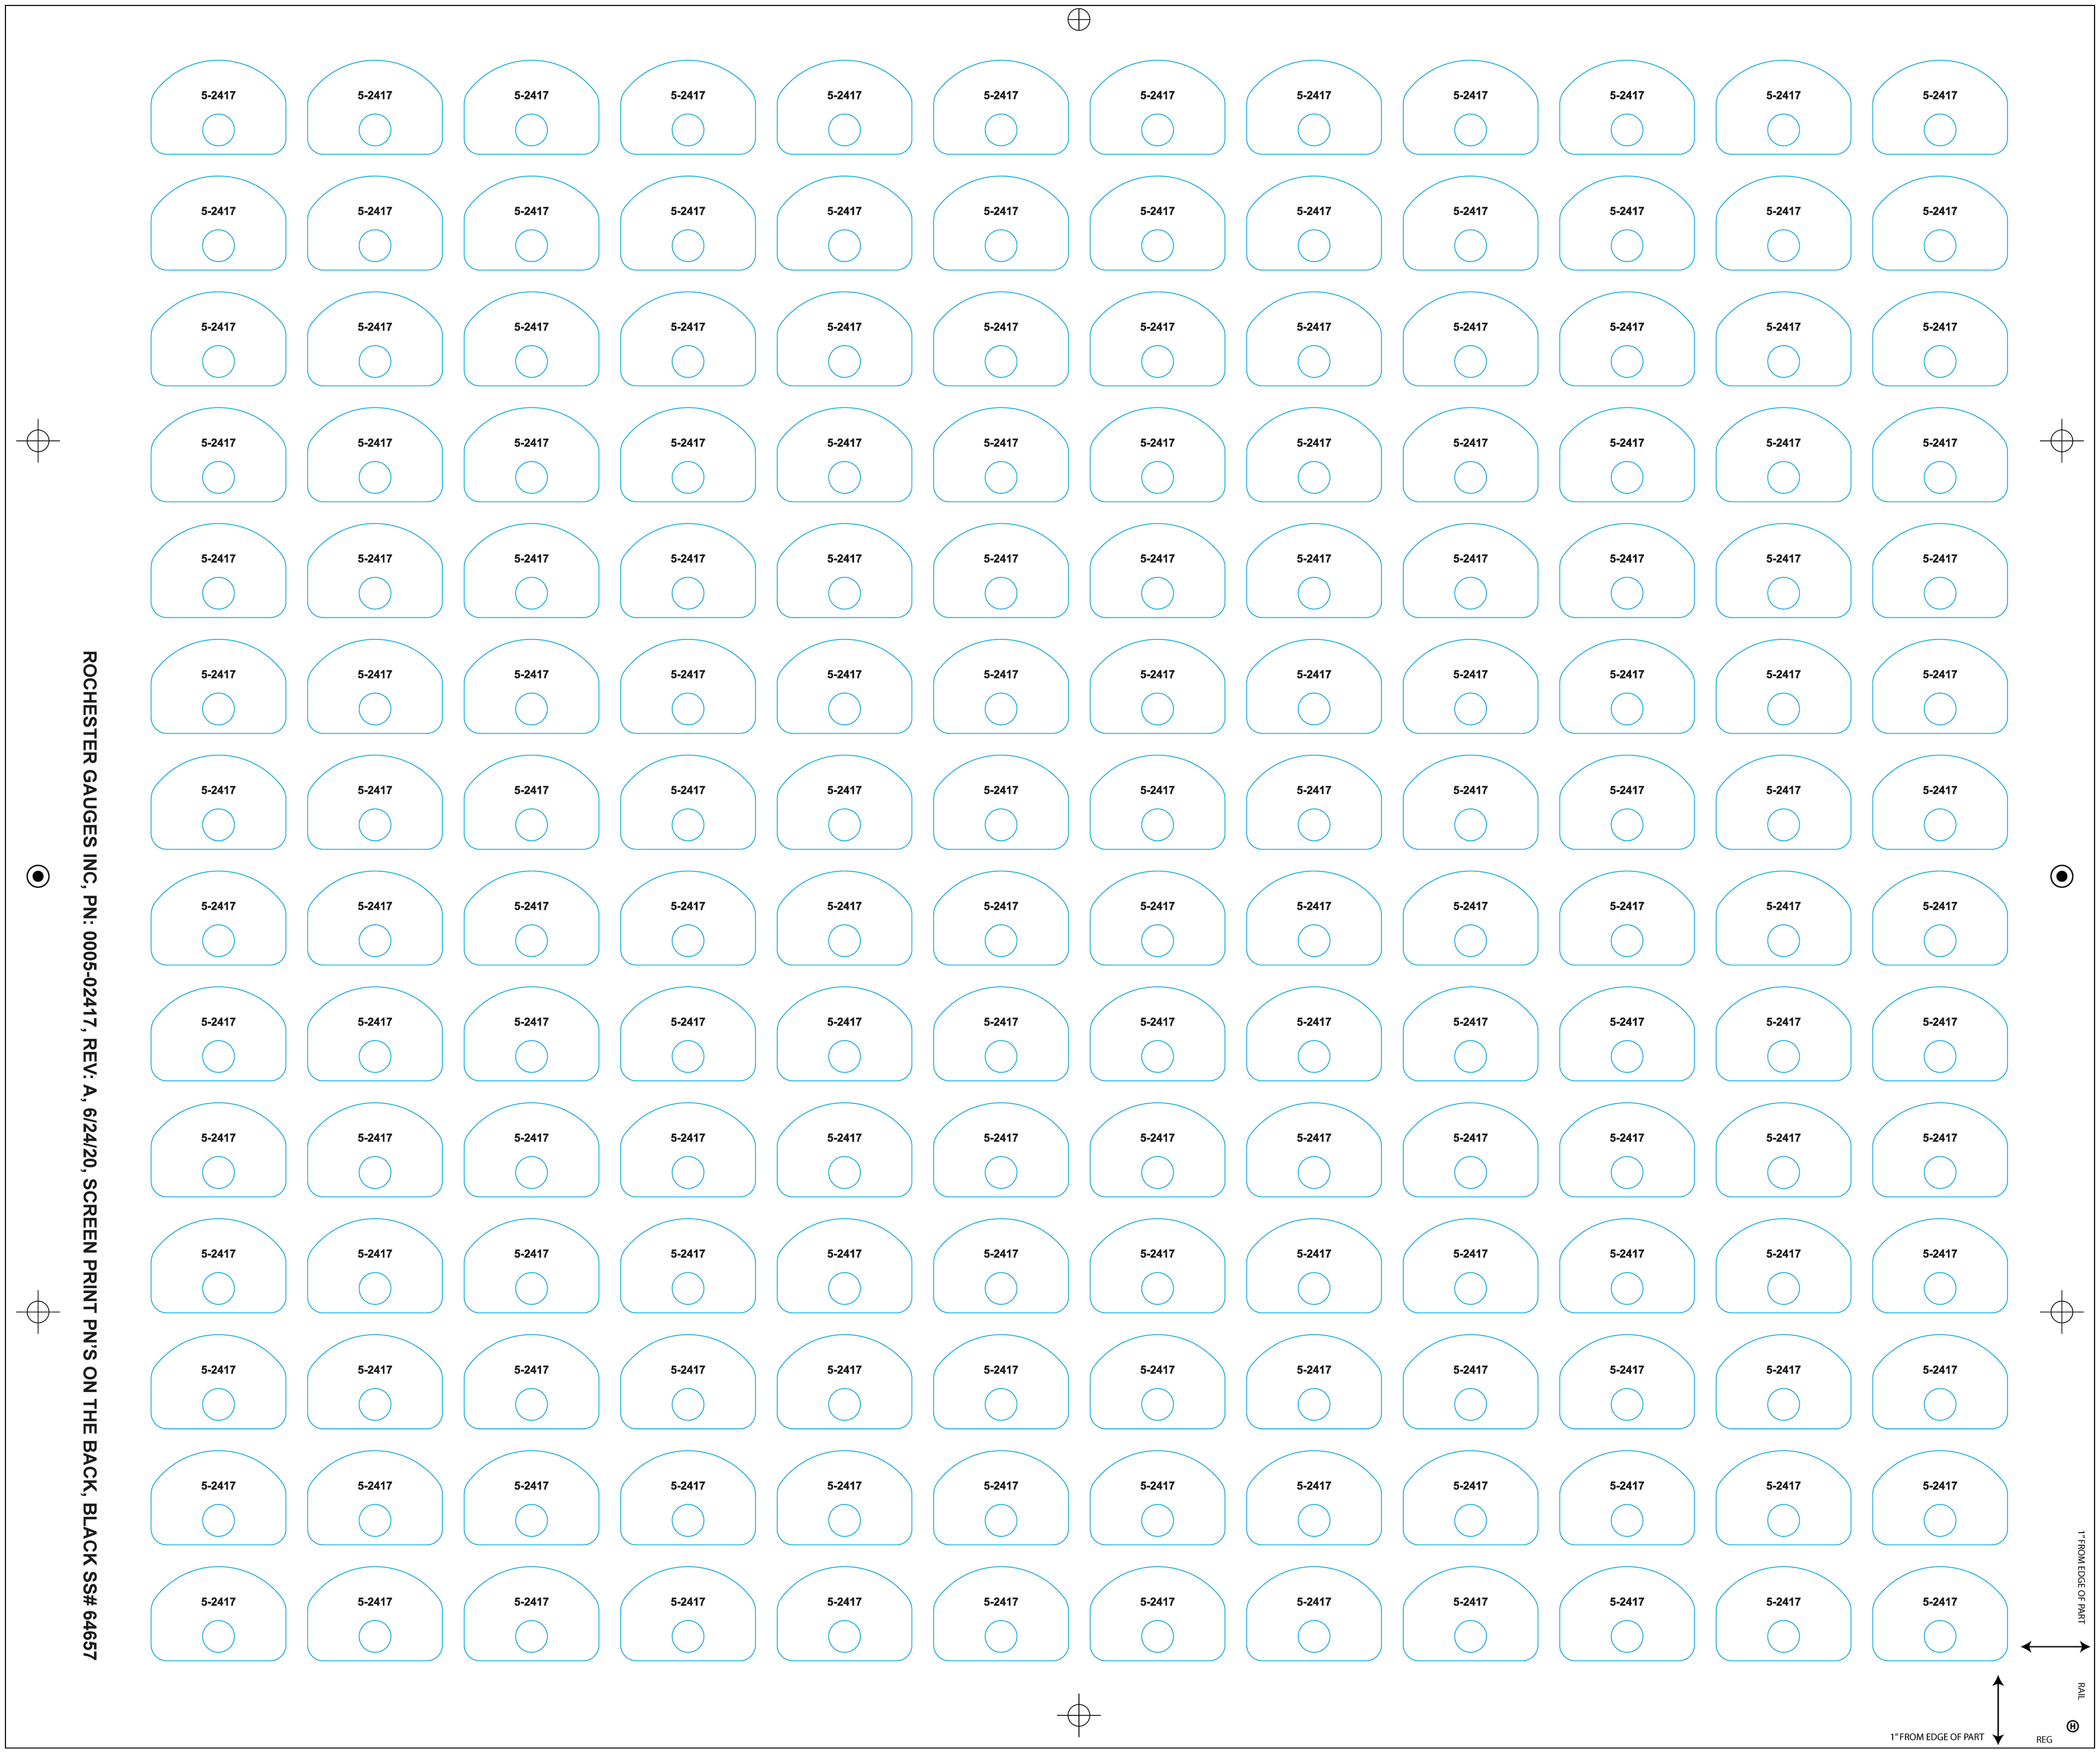
STEP & REPEAT
A multi-function set up like this one can be one of the toughest types to complete. This is because the pieces sit a quarter inch or a half inch away from each other with many sets of vision marks placed on the art board for print and fabrication purposes. Some of these marks help with print alignment such as target marks, while others are markings for different fabrication machines such as the two Coherent laser marks on the left and right sides of the art board. There are also Zund dots that are placed next to each individual piece. Some visual aids like the shadow line around each piece and inside the circle cut outs serve as visual aids for cutting to make sure that the print alignment is accurate. Completing a job like this one takes about 10 to 30 minutes to setup. There are many multi-functional job setups that could take much longer. This can be because of the certain way your colors need to be trapped, the amount of visual aids needed on the art board, correlating the film numbers to the trapped colors properly, film is setup and output, and the setup to your cut files and metal photo films or digitally shared files as needed. Troubleshooting can also be needed if the job is experiencing complications with print or fabrication. For example, this job needed the shadow lines positioned in these certain areas to allow the operator to visually see if there was any loss of accuracy while cutting the pieces out. This helped them see that during the screen print process, there was screen stretch occurring because the latter pieces wouldn't be accurate compared to the first set of pieces up to a certain point. This problem was resolved because we redesigned the shadow lines which resulted in exposing the problem and was corrected so that the pieces were to finally be printed, cut, inspected, shipped, and ready to satisfy the customer!
HOW I CREATED THE STEP UP
1.) I placed a copy of the individual gauge drawing onto the 24" x 20" art board.
2.) The piece was positioned 1 inch from the left and 1 inch up from the bottom.
3.) The yield (quantity) on one sheet of material was 168 pieces. I duplicated and repeated the piece 14 up and 12 across with a 0.25" inch gap in between.
4.) My vision marks, reg and rail, and job information were added next.
5.) I created another art board the exact same size, and duplicated my step up onto it. Then I flipped the imagery to add the part number design that would be printed on the back of each nameplate.
6.) The job was completed and needed to have film outputted emulsion up positive for the screen print process.
7.) After the job ran through the shop the first time, it was caught that not all the parts were accurately cut.
8.) By doing quality research, the troubleshoot request came in to have the shadow lines be designed and placed in a unique fashion to help expose the underlying problem.
9.) After adding these in, the conclusion came was screen stretch had been being experienced and that it needed to be resolved.
10.) This was fixed and the parts were able to run through the shop floor precise and be shipped ready to satisfy the customer.
Rochester Gauges Inc. & Fly Wheel Supply - gauge and nameplate design
OTHER STEP UPS...
MULTI-FUNCTION

Art Proof

Multi-Function Step Up
COMPOUND DIE

Art Proof
Compound Die Step Up
I AM TRAINED IN...
• Reading and interpreting blueprint drawings.
• Preparing proofs for customer review using Adobe Illustrator.
• Putting together artwork files and preparing them for print and fabrication processes.
(Screen Print, Etch Print, Metal Photo Etch, Ink Stamp, Manual Shear, Progressive & Compound Die, Coherent Laser Cut, IPG Laser Cut, Thermal Print, Hot Stamp, Hudson, Guillotine, Roll Form, Flexograph, Matan, and Allen Datagraph)
• Trapping colors for production, and setting up film output.
• Designing and distributing files for die-lines and subcontract work.
• Encoding various barcodes using BarTender.
• Proofreading comp sheets and film for accuracy, errors and process details.
• Troubleshooting the printing and manufacturing processes when needed.
• Helping to maintain department equipment (6S Lean Process Improvement).
GRAPHIC DESIGN
During my tenure at Willington Nameplate, I worked in a second position as a graphic designer for the company under the instruction of Jessica Mitchell. She was the Senior Designer as well as the Continuous Improvement Leader and I gained a lot of knowledge from working side-by-side with her. While working my primary position as an operator in the Prepress Department; Jess would assign me different types of pro bono work to complete at the same time. I designed work for a retirement celebration, an affiliated family business, high school graduation celebrations, and for a community service event called "Helping Hands," sponsored and operated by Willington Nameplate Inc.
Check out the newsletter story and photos below!

Full Page Ad

Lawn Sign Design
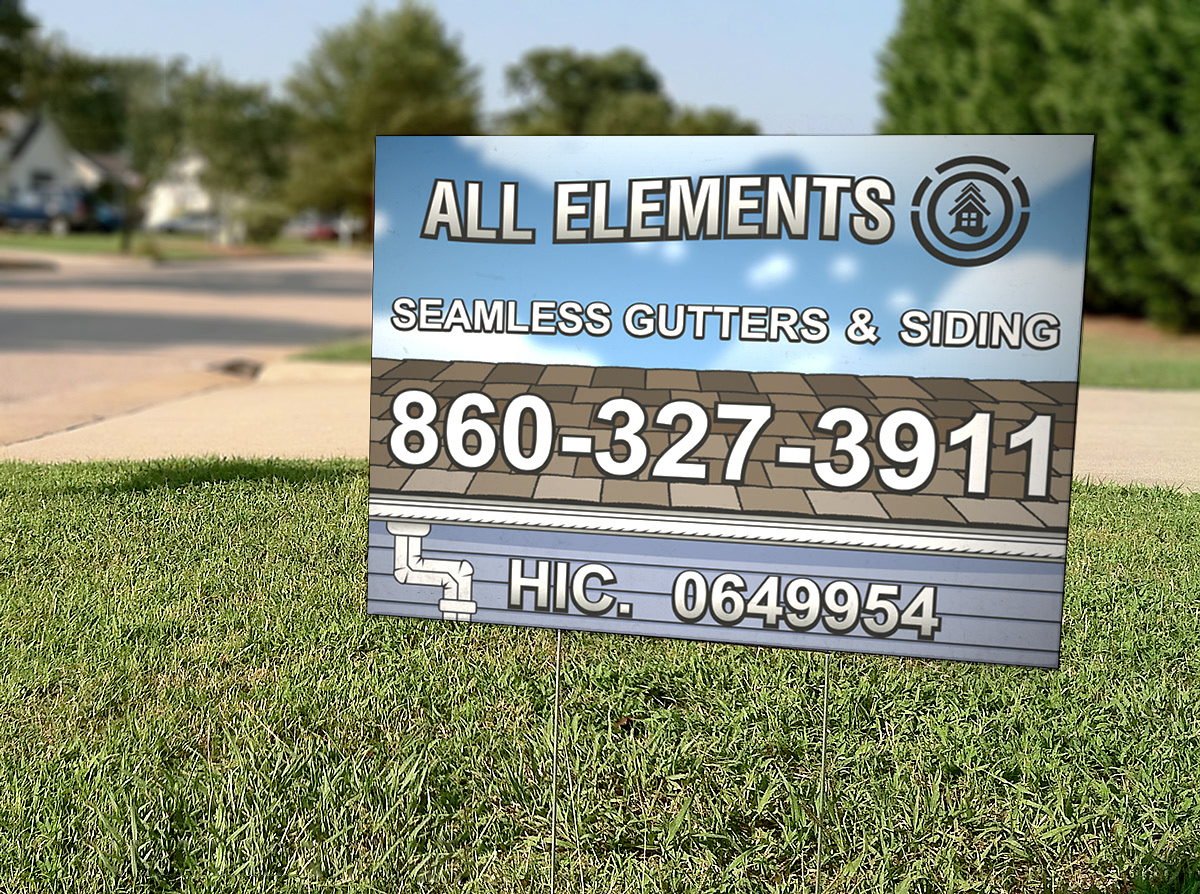
Lawn Sign Advertisement

T-Shirt Mock-ups

T-Shirt Front Design

T-Shirt Back Design

Tee Shirts!

Front

Back

Tolland High School - Banner Design

Tolland High School - Neighborhood Banner Design

University High School of Science & Engineering - Student Graduation Banner Design

University High School of Science & Engineering - Student Graduation Banner
TESTIMONIALS
"I thoroughly enjoyed my time working side-by-side with Luke, and came to know him as a truly valuable asset to absolutely any team. He is honest, dependable, and extremely hard-working. Beyond that, he has an incredible sense of design and a mastery of Adobe Creative Cloud that results in superior design and efficiently built files for both digital and print applications."
Jessica Mitchell
Continuous Improvement Leader / Senior Designer
"I can confirm that he has a good work ethic and strong analytical skills. Luke is a team player, makes sound business decisions and proactively communicates with others. He is also creative and quality conscious."
Brett Greene
President